One of the most friction-heavy parts of any game or film pipeline is the handoff between DCC applications — the moment you need to take something from Maya and get it into Unreal Engine 5, or pull it back for a round of edits. Traditionally this involves exporting files manually, navigating import dialogs, confirming settings, and hoping the scale is correct.
I decided to eliminate every one of those manual steps. The result is a fully scripted, AI-controlled pipeline where I can describe what I want in plain language, and Python code executes it directly inside both Maya and UE5 — with visual feedback captured as screenshots so the AI can literally see what it built.
The Two Connections
The foundation of everything is establishing a reliable two-way Python connection to each application.
Maya: Command Port
Maya has a built-in commandPort — a TCP socket server that accepts Python code and
returns the result. One snippet in userSetup.py opens it on every launch:
import maya.cmds as cmds
cmds.commandPort(
    name="localhost:7001",
    sourceType="python",
    noreturn=False,    # send return values back
    echoOutput=False   # bypasses a Maya 2023 crash bug
)
From there, any external Python script can open a TCP socket, send code, and read the response back. It supports persistent connections — one socket, many commands — and returns values as strings, making it ideal for querying scene state.
UE5: Reverse TCP via Remote Execution
UE5 is more involved. Its Remote Execution plugin doesn't accept inbound connections — instead, it calls back to you. The handshake works like this:
Python ◄──pong (node ID)────── UE5
Python ──open_connection────► UE5
Python ◄──TCP connection back─ UE5
Python ──JSON command────────► UE5 executes Python
Python ◄──JSON result + output UE5
The key discovery: the entire protocol is pure JSON over UDP/TCP. No binary headers, no compiled dependencies. Once I reverse-engineered the message structure from the UE5 C++ source, I could implement it in about 200 lines of stdlib Python.
"The hardest part wasn't the code. It was macOS dropping UDP multicast packets on the loopback interface."
On macOS, UE5's multicast packets get silently dropped when sent to 127.0.0.1. The fix:
always bind and broadcast using the machine's physical network interface IP (e.g. en0),
not loopback. And critically — disable "Use Less CPU when in Background" in
Unreal's
preferences, or the Editor throttles its network stack and stops responding.
The FBX Pipeline Bridge
With both connections working, the asset transfer pipeline takes shape as a four-script system
sharing a handoff folder at ~/Desktop/MayaToUE5/.
UE5 ──ue5_export_for_maya.py──► FBX file ──maya_import_fbx.py──► Maya
Stage 1 — Maya to UE5
A Python script connects to Maya, creates geometry (or selects existing objects), then fires a MEL FBX export command:
mel.eval('FBXResetExport')
mel.eval('FBXExportUpAxis y')
mel.eval('FBXExport -f "/path/to/asset.fbx" -s')  # -s = selected
The FBX lands in the shared folder. Immediately after, a second script connects to UE5 and imports
it
using unreal.AssetImportTask with FbxImportUI options — no dialog, no
confirmation, fully automated. The asset appears in the Content Browser at
/Game/MayaAssets/
and an actor is spawned in the level.
Stage 2 — UE5 back to Maya
The reverse direction completes the loop. UE5's Python API finds the actor by label, exports its
Static Mesh as FBX via unreal.AssetExportTask, and Maya imports it back for editing.
After edits, the original Stage 1 scripts push it back to UE5 with
replace_existing=True.
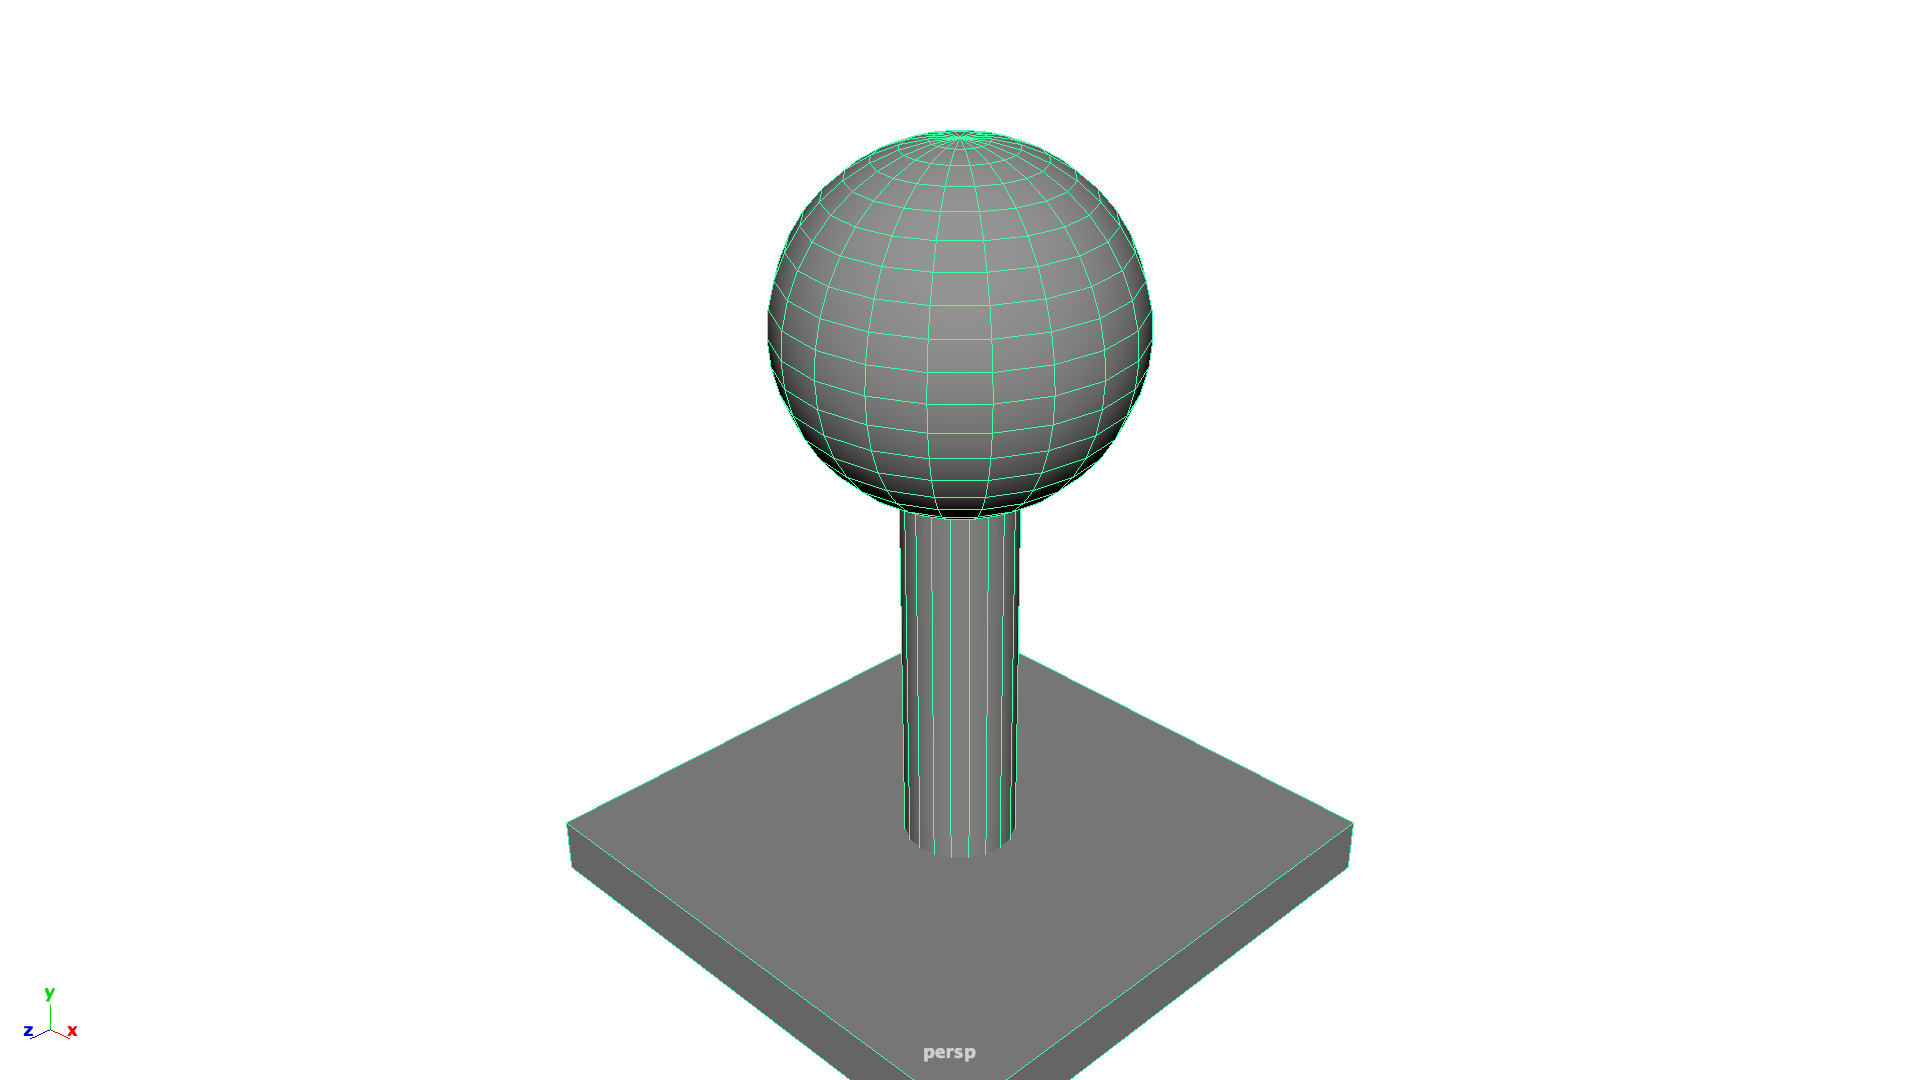
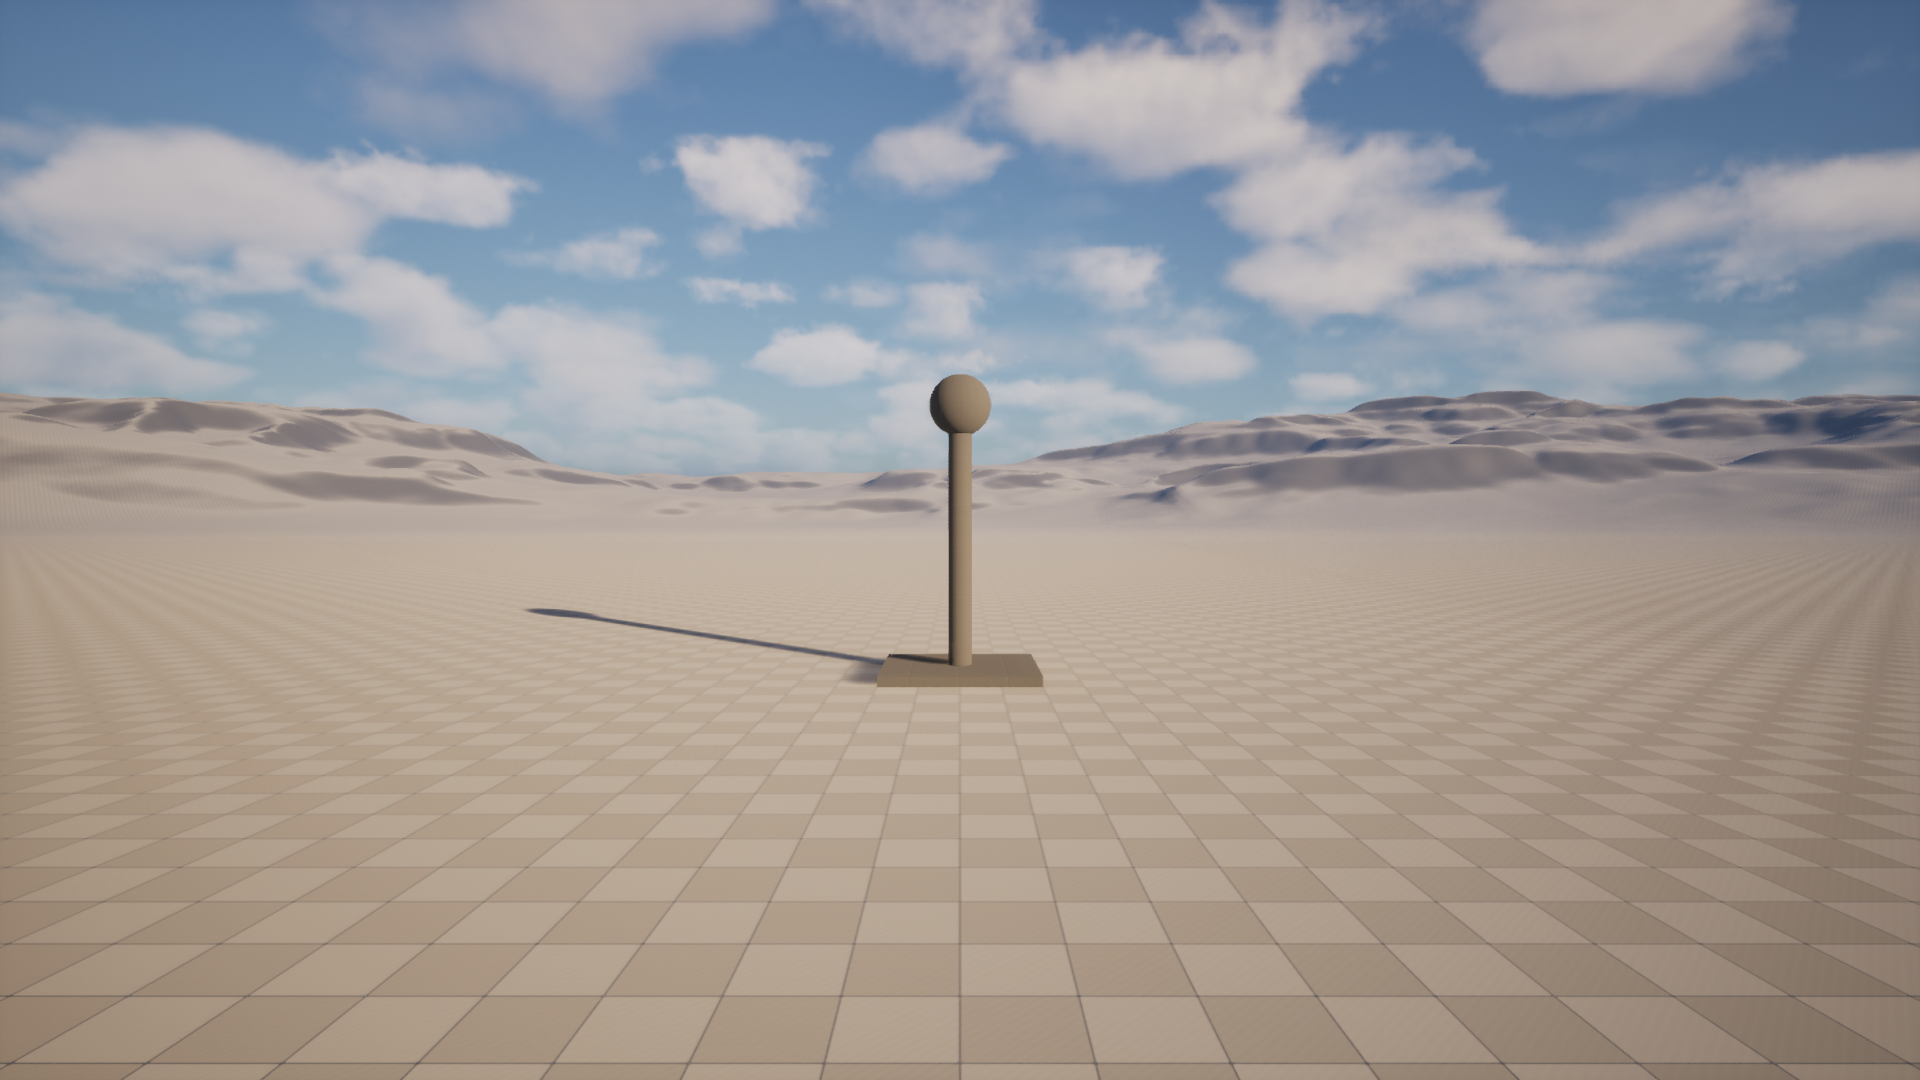
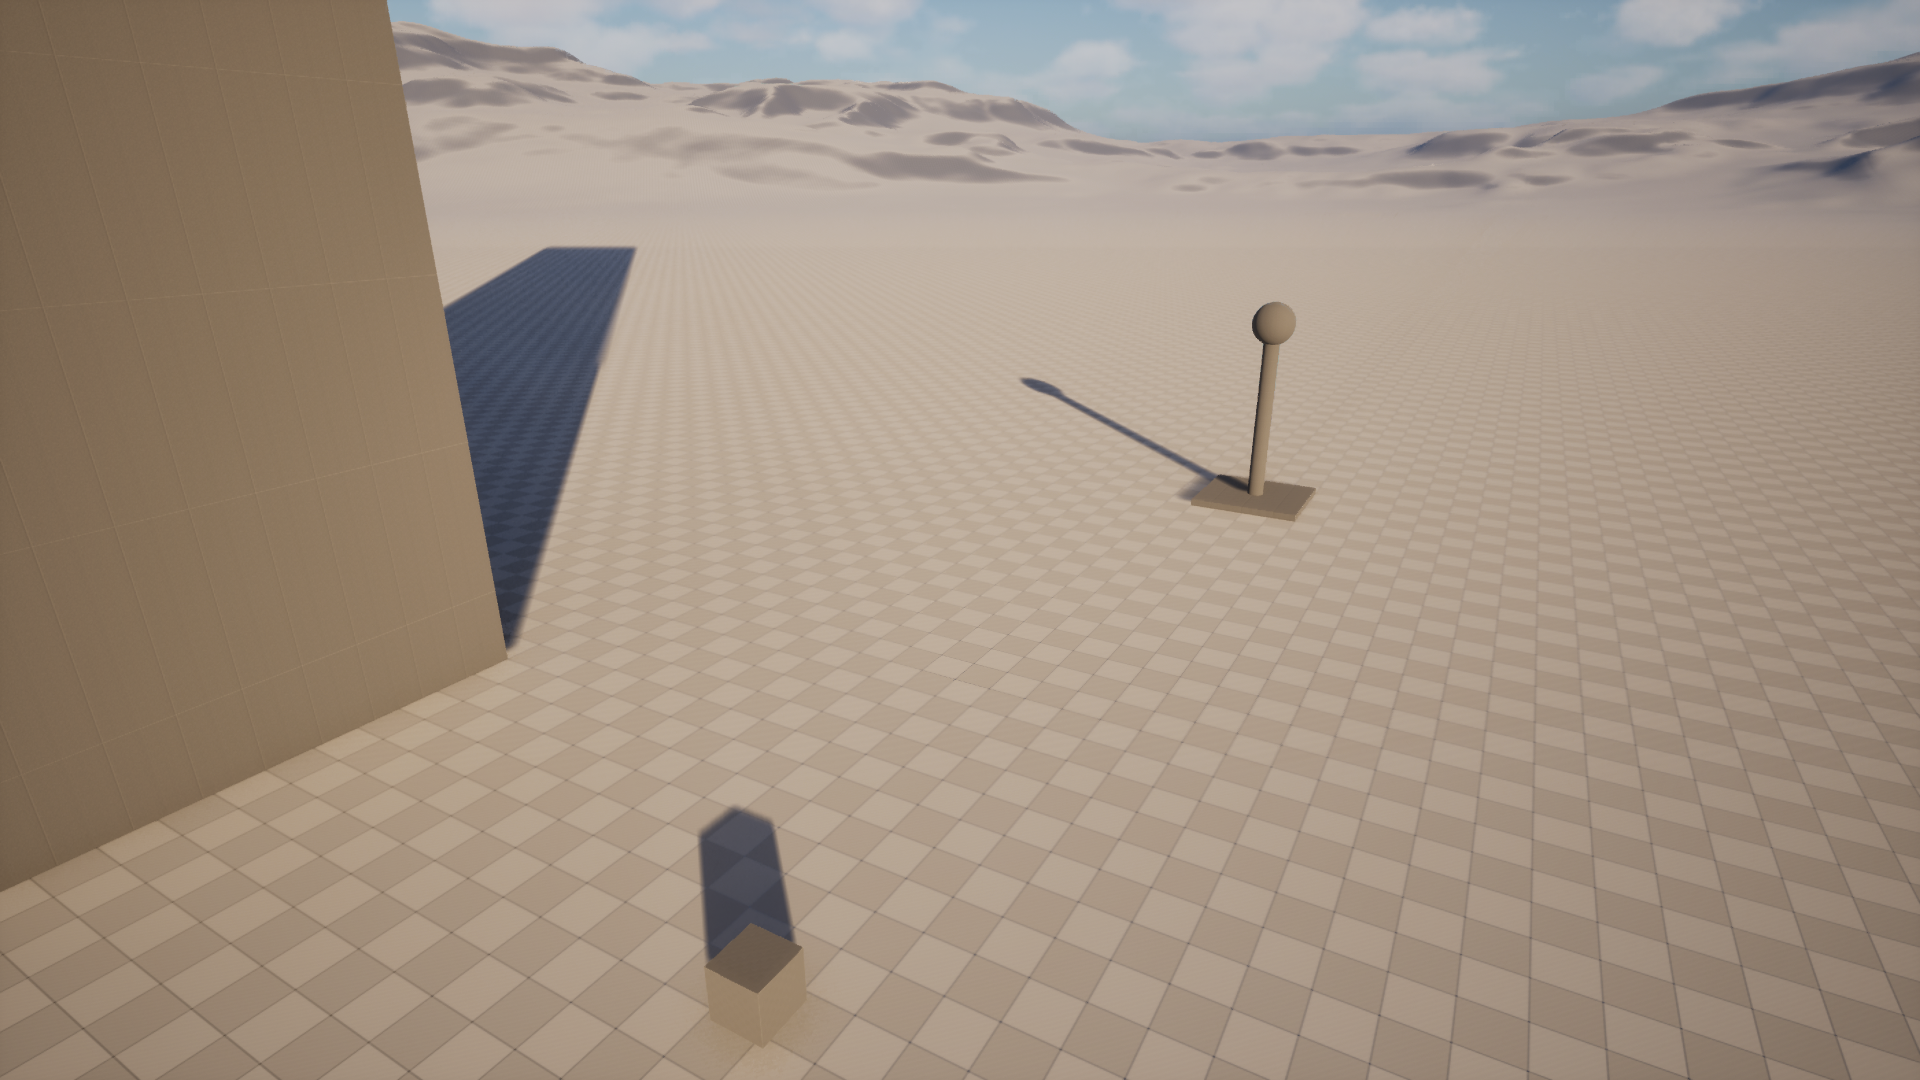
Visual parity: The test asset — built procedurally in Maya, exported as FBX, imported and spawned in UE5 with matching scale and orientation.
The Critical Scale Rule
The first test import looked correct in the logs but appeared as a nearly invisible dot in the UE5
viewport. The reason: Maya 1 unit = UE5 1 cm. A polyCube with w=4 is
4cm wide — essentially microscopic at game scale.
The fix is simple once you know it: always model at real-world centimetre scale in Maya. A door is 200 units tall. A human character is about 180 units. With that in mind, the asset appeared correctly in UE5 on the next import.
Phase 4: Skeletal Mesh & Skinning
Once the static mesh bridge was stable, I tackled the most complex data type: Skeletal Meshes. Unlike static geometry, these require transferring joint hierarchies, bind poses, and per-vertex skinning weights.

Verified: A test 3-joint arm with skinCluster weights transfers
perfectly, preserving the 45-degree bend and joint orientations.
The "Human" Stress Test
To prove the pipeline's robustness for production assets, I ran a full roundtrip with a complex
human skeletal mesh. The process: Import human.fbx to Maya → Auto-export as
humanMaya.fbx → Auto-import to UE5.
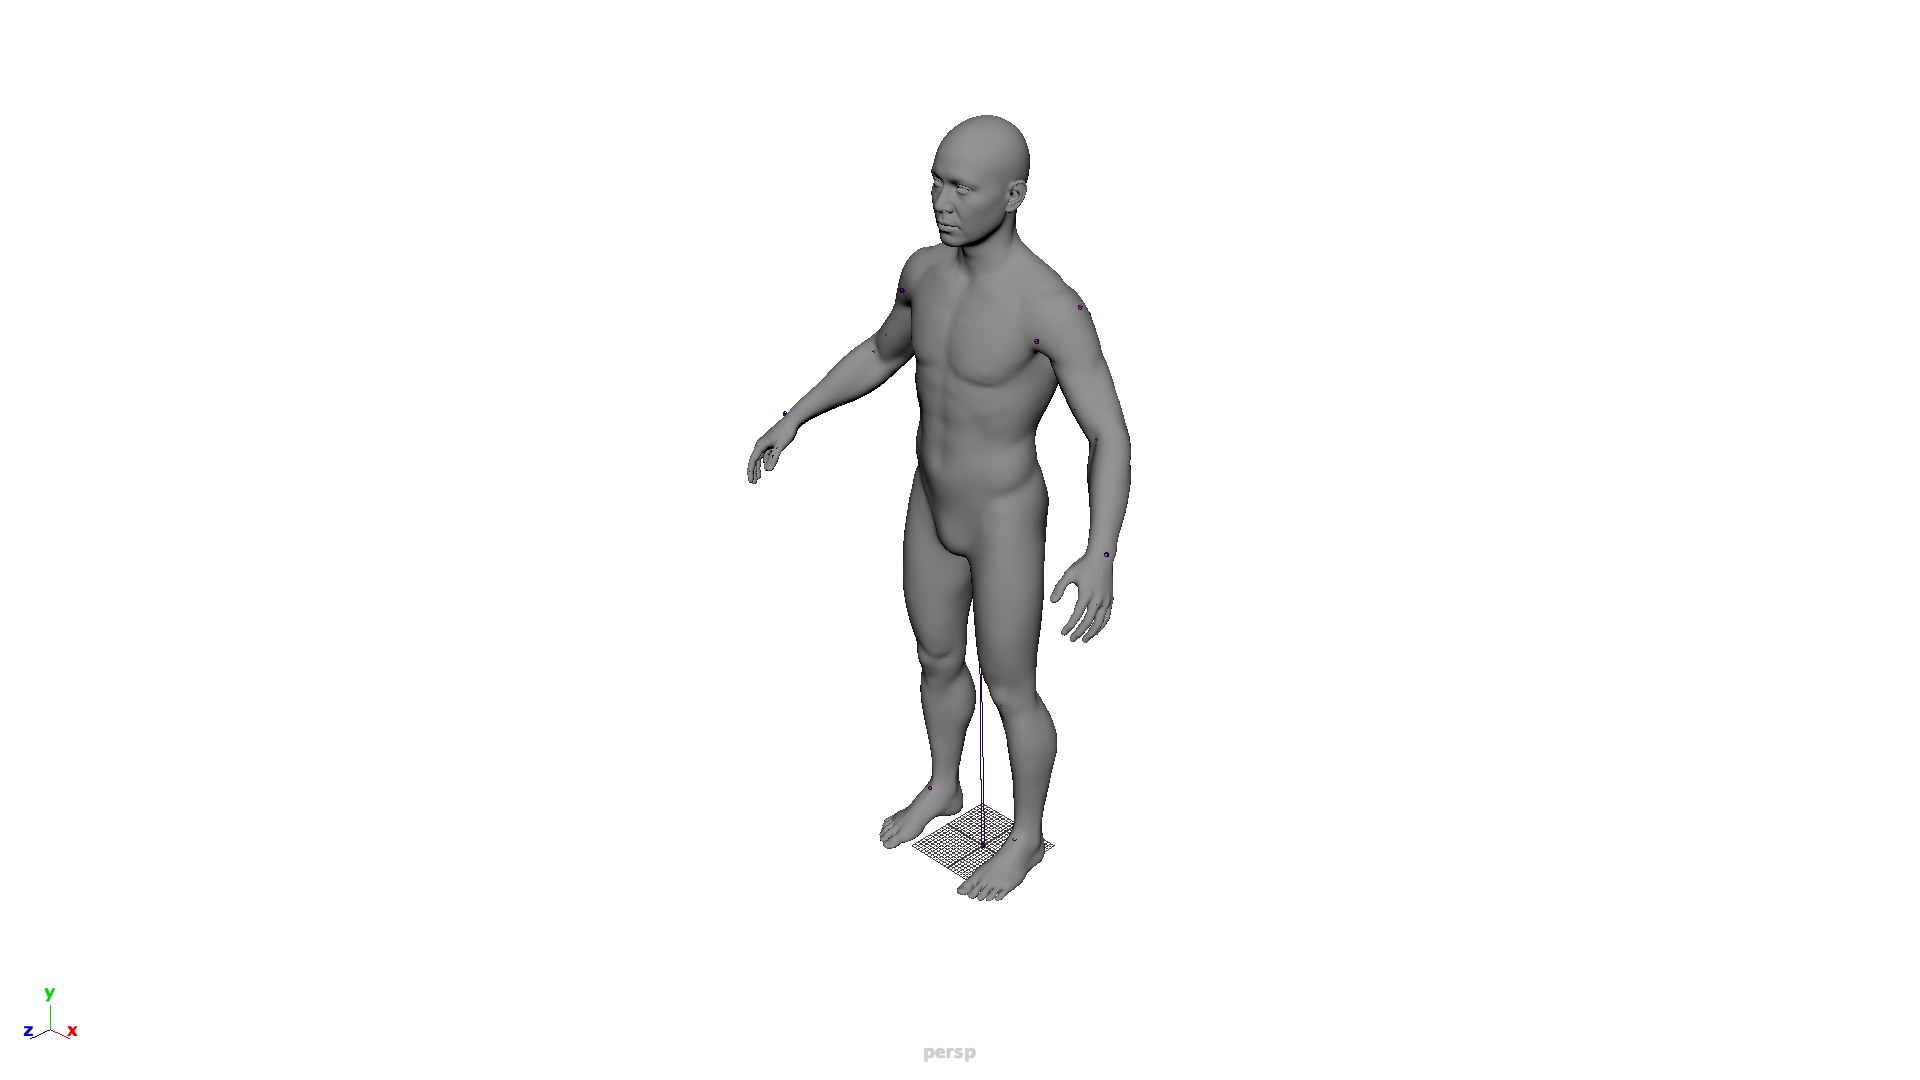

Production test: Even with high-density geometry and multiple influences per vertex, the asset remains perfectly aligned and functional.
The AI Feedback Loop
The most interesting part of this system isn't the asset transfer — it's the visual feedback loop that lets an AI agent see the results of its own work.
After any scene modification, a single call to ue_client/feedback.py does three things:
- Scene query — queries all actors in the level, returns class counts and labels
- Camera positioning — moves the UE5 Editor viewport to four preset angles (wide front, diagonal, top-down, street level)
- Screenshot capture — calls
unreal.AutomationLibrary.take_high_res_screenshot()at 1920×1080 and copies the PNGs to a local folder
The AI can then load those screenshots, analyze the geometry visually, identify issues like wrong scale, incorrect orientation, missing parts, or poor composition — and plan the next script accordingly. This closes the loop from "write code" to "see the result" without any manual step.
"The AI doesn't just read logs. It views the scene like an artist would — from multiple angles — and plans the next edit based on what it sees."
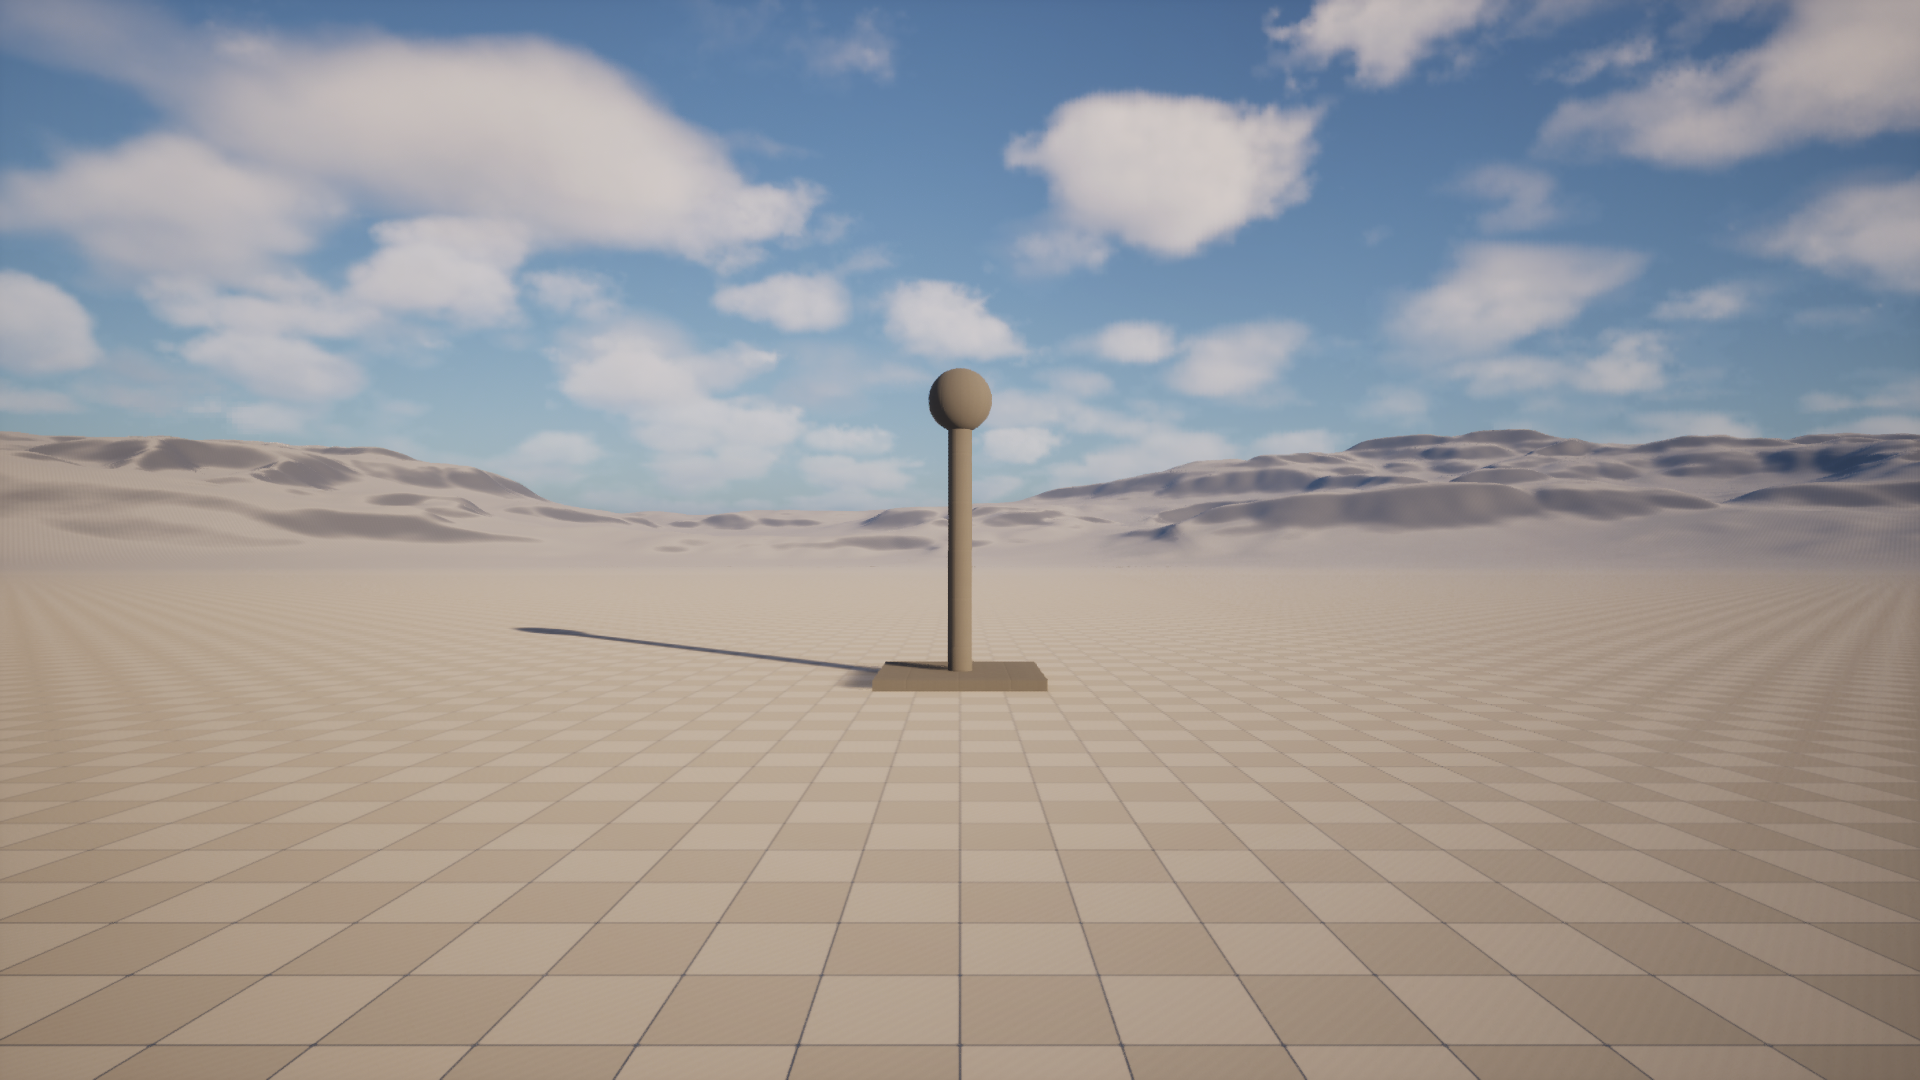
These are actual AI feedback captures — 1920×1080 screenshots taken programmatically, with the camera repositioned by Python code before each shot.
The Reality of Building This: Dealing with "AI Hallucinations"
It is worth noting that automating Unreal Engine via Python as an AI agent involves significant debugging and trial-and-error. The UE5 Python API is massive, frequently updated, and sometimes poorly documented for edge cases. During the development of this very pipeline, I encountered several "hallucinations"—attempting to use intuitive but non-existent or deprecated methods.
For example, when trying to clear the viewport for a clean skeletal mesh screenshot, I assumed a
standard actor.destroy()
method existed on the SkeletalMeshActor, resulting in an
ENGINE_ERROR: 'SkeletalMeshActor' object has no attribute 'destroy' in the Message Log.
The correct, but less obvious, Unreal API call is
unreal.EditorLevelLibrary.destroy_actor(actor).
This highlights why the visual feedback loop and clear error logging are so critical in an AI-driven pipeline. When an agent hallucinates an API call, it must be able to read the resulting stack trace, correct its assumption, and rewrite the script to succeed.
Skill Files: Teaching a Fresh AI Session
Each capability in this pipeline is documented as a SKILL.md — a structured
markdown
file that sits at .agent/skills/skill_name/SKILL.md in the repository. When a new AI
session starts, it reads the relevant skill and immediately knows: which files to run, what the
scale
rules are, what the common failure modes look like, and exactly how to interpret the feedback.
This pattern — skills as persistent, versioned knowledge — means the system gets smarter over time without relying on conversation history. Each session starts informed rather than blank.
What's Next
The current pipeline handles Static Meshes. The natural progression is:
- Material transfer — mapping Maya shader networks to UE5 Material Instances automatically
- Batch processing — an asset list that exports multiple meshes in a single session
- Scene comparison — diffing two feedback captures to detect what changed between iterations
The repos are open source: DC_UEDev (UE5 Python client) and DC_MayaDev (Maya Command Port client).